
Source note
Move names, rarity labels, and obtainment notes are checked against the public official Trello where available. Tier placement, scores, counters, recommended styles, and planner recommendations are site-maintained data, not official developer balance values. See the source standards.
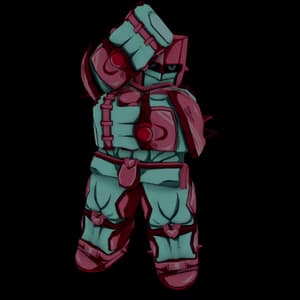
Overview & Rarity
The public official Trello is used here for move names and obtainment notes. On this site, Crazy Diamond is grouped under the local Uncommon label, obtained primarily via Stand Arrow, and currently placed at B Tier in the planner dataset.
Crazy Diamond Showcase Video
Moves & Abilities
How to Get Crazy Diamond in Bizarre Lineage
Crazy Diamond is obtained via Stand Arrow. The public Trello confirms the obtainment method, but it does not publish exact drop percentages on this page.
Crazy Diamond Counters & Matchups
Strong Against
Weak Against
Site Planner Builds for Crazy Diamond
Planner PvP Setup
Our local planner currently pairs Crazy Diamond with boxing and hamon. This is a site recommendation, not an official balance callout.
Crazy Diamond Stat Breakdown
Crazy Diamond scores 7/10 in Damage and 9/10 in Combo potential. This is mid-range under the local planner formula, not an official damage number.
For crowd control, Crazy Diamond sits at 5/10 CC with 3/10 AoE coverage. Its local CC score is moderate in the planner dataset.
Mobility is rated 6/10 and Sustain 9/10. Its local mobility score is moderate.Its sustain score is also high in the site dataset.
Crazy Diamond is grouped under Uncommon on this site. The 90 awakening value shown in planner data is site-maintained; the public official Inner World card confirms Level 50 and Stand Conjuration 100 as the awakening option requirement. Use that planner value only as an internal comparison point, not as an official per-Stand requirement.
Common Mistakes with Crazy Diamond
- ×Picking Crazy Diamond without testing the suggested boxing pairing first. The planner suggests it to cover Crazy Diamond's local sustain gap, not because developers recommend it.
- ×Treating a planner matchup as official. Crazy Diamond is marked as struggling into King Crimson in the site dataset; verify in-game before making decisions.
- ×Skipping planner comparison. Even when local tiers match, testing style and sub combinations can surface tradeoffs.
Frequently Asked Questions
Is Crazy Diamond good in Bizarre Lineage?
How do I get Crazy Diamond?
What is the best build for Crazy Diamond?
What does Crazy Diamond counter?
Crazy Diamond Skins
Grayscale
Common
Luffy
Common
Reverso
Common
Related Stands
Compare Crazy Diamond in the site planner
Test your Stand + Style + Sub combo before committing. Most players skip this and regret it.
Check Crazy Diamond Build ScoresSite Planner Scores
Pros & Cons
These strengths and weaknesses are site-maintained planner notes, not official Trello labels.
Strengths
- Strong healing access
- Strong combo potential if Rock Trap connects
Weaknesses
- Low range
- Hard to win neutral